
The New Zealanders have started a new tradition of DIY coffins. This idea was born out of the desire to have a fully customized coffin themed for the founder of the Kiwi Coffin Club, Katie Williams.
Building your own coffin has many benefits which range from the cost-saving or environmental element of doing it yourself to the psychological boost it gives you in accepting your own mortality. In addition, it’s a worthwhile project which gives you new skills & a new perspective about the future.
What Katie Williams wanted was something that was certainly not for sale in the mass market. She wanted her coffin to be themed after Elvis Presley, her life long passion.
Perhaps you are not looking for a specific theme. Or perhaps you might just be trying to be thrifty and not burying a lot of money, so to speak. Or perhaps you would just like to have a meaningful project to make sure you have input and lessen the burden of your passing.
There might be a hundred reasons why you might be interested in building your own coffin. Since you are here, you most likely have a motive but want to know if there are any tips that can help you get started or even to make your decision.
So here are a few tips.
- Consult with the local government and funeral director to check local laws and rules on using home-made coffins/caskets.
- Choose a coffin or a casket: coffins are cheaper because they use less material but require more skill to build.
- Choose your material: wood is cheaper, and MDF is the cheapest , much more so than then pine or poplar (softwoods) and harder woods like oak and walnut.
- Choose to go green (or not); avoid metals, glues, and treatments.
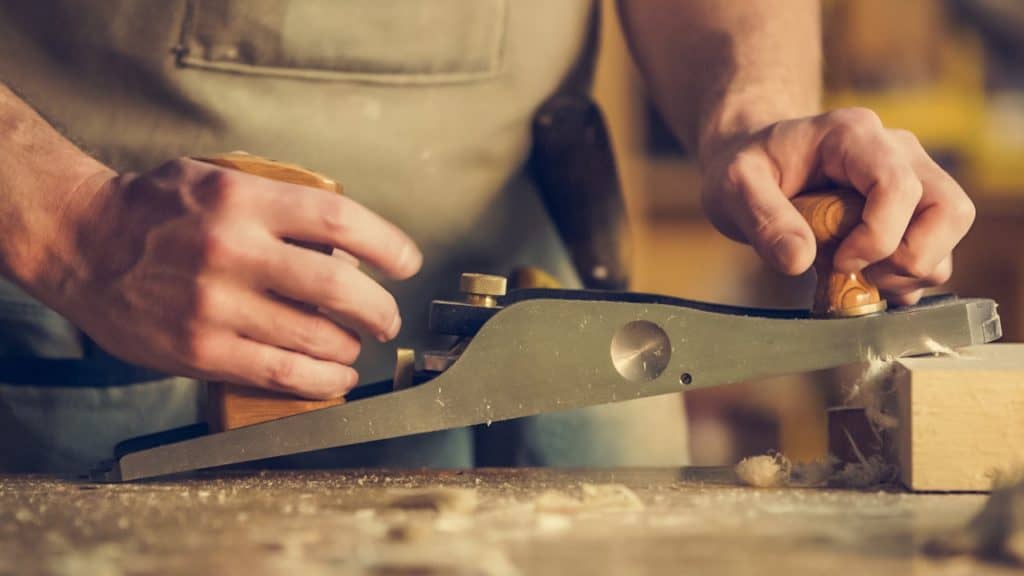
- Make sure you have the tools; cutting tools, like saws and chisels, and hammers and mallets,
- Work off a plan: buy or draw real blueprints to follow.
- Make sure you have a place to put it until you need it.
- Test it out: Make sure that it can handle the weight of a body for transportation from A to B.

Why Should you do it?
From the words of Katie Williams “death is pretty natural” and building your own coffin can be a healthy way to come to terms with our own mortality.
No only is it incredibly therapeutic, it can be economically beneficial as well as give the builder a meaningful project. In addition to this, it can be a fun group activity which you can share with friends, children and even grandchildren. I think that this trend which has been championed by the Kiwi coffin club is a very interesting one to be a part of.
How to get started?
Beginning this project and the time it takes to complete it really depends on your experience, access to the right tools and materials and your ability to store the finished product.
As a beginner
If you have never built something like this, but let’s face it most of us haven’t, then you should seek out the right assistance. If you don’t have a family member who is knowledgeable about DIY then consider taking a short foundation course in working with the material of your choice (more on that later).
Rent the tools rather than buying them. If you don’t have the intention of building multiple coffins or caskets, then don’t feel like you need to buy a lot of equipment. Go to your local hardware store or warehouse and you can normally get very competitive rental rates.
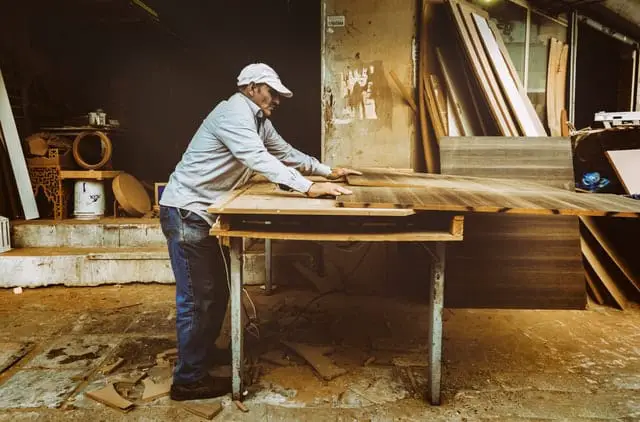
As consider the space you’ll need to build the coffin or casket. If you don’t have a garage, then you can ask a friend, neighbor or relative to loan out theirs. You can even contact your local high school and see if you could build it in their woodwork shop.

If you don’t have the tools or materials to hand and are feeling a little bit overwhelmed with the experience you can even go and speak to your local joinery company and ask them to help you build it, them may even be able to get you involved with some of the hands-on tasks.
Make your plans clear

Some people are terribly squeamish about death and they may not understand why you have taken this practical step to your own funeral or that of a loved one. Some may even not want to see the finished product having around your home.
In order to bring people on board, when necessary, and to ensure that your wishes are carried out just be open and honest with them. If you are doing this for financial reasons, then explain that the same can be said for any other personal you have for building your own coffin.
Most importantly of all, include the desire to be buried in your DIY coffin in your will and letter to the executor of that will.
Also confirm that you can be buried in the type of coffin you have in mind by consulting with the cemetery of your choice and local funeral home. Don’t get pressured into purchasing something you don’t need to. If you don’t know exactly what to ask when pre-planning your funeral, check out my full article on this topic here.

Coffin or casket?
Many Americans and Westerners use the term casket for funerals, and the word coffin is allocated to Halloween themed classroom worksheets but do you actually know the difference?
Simply, caskets are rectangular where coffins have that tapered shape that is well known in the films and stories.
So why the difference? It is my belief, that caskets were the originators, as a rectangular box is much easier to build, but then “coffin” builders started noticing that they could reduce the amount of wood used if they tapered the coffin toward the feet and head, and thus the coffin was born. After all, why bury more wood than you need to?
For centuries, (again my opinion) the coffin was used, when some funeral director, playing into the American trend seen in cars, TVs, and houses, brought the idea “bigger is better” to the coffin industry, and the casket was resurrected.
In recent years, Western culture has begun to abhor the wasteful ways of the “bigger is better” mantra and has redeveloped a minimalistic ideal.
Coffins certainly use fewer materials, and this can both save you some money as well as maintain a Green approach.
Caskets or Coffins for a beginner builder?
Despite the environmental and economical benefits of opting for a coffin, it has to be said that building a basic wooden box, i.e. a casket, is far easier than perfecting the tapered design of your average coffin.
If you are doing this for more than just economic reasons, then you may find that building a more straight-forward design can help you deal with your own mortality just as much as a more ambitious project.
Buying a custom kit
So if you don’t think you can handle this job, but you still want the benefits of a DIY coffin there are quite a few retailers out there that produce DIY coffin kits. If you can assemble an IKEA bookcase, you can probably handle one of these kits.
Here are my top picks:
Choosing the right Materials
The material you chose can have three major effects on your DIY coffin (or casket). First, it can alter the cost greatly. Second, it can affect the durability quite significantly. Thirdly, it can influence the difficulty factor of the build itself.
The main two materials often used are wood, and metal and I will discuss them in more detail below. But, let’s discuss a few alternative materials first; fabrics and cardboard.
Non-traditional coffin materials
Fabrics
Many cultures around the world, have the tradition or history of wrapping the dead in linens for burial. This could certainly be a valid consideration, but we are talking about making a coffin-like shroud here.
So how can this relate? Consider leather working. A durable, but biodegradable, coffin could be fashioned out of hardened leather but I would suspect that it would still lack the rigidity of what we have come to expect from a coffin.
Nevertheless, this could be a perfect alternative if you are considering a cremation instead of a burial. Also, if you are good with a needle and thread you could also sew, knit or quilt a suitable burial shroud which could be used either in a green funeral using a rental coffin (see my articles about renting coffins or cremations without coffins) or for a more traditional cremation.
Cardboard
Finally, we have cardboard. Now we are not talking old pizza boxes. Cardboard technology has come along way. Uline is a company that produces high weight cardboard sheets that are ⅝” thick and can withstand 1100 lbs of weight.
This product can certainly hold out for the funeral. Cardboard has two major benefits; ease of workability and biodegradability. It might be the cheapest, greenest, and easiest material choice if you can get past the stereotype of being buried in a cardboard box.
Using metal as a building material
Many caskets these days are made of metal. Metals are durable and relatively easy to work with for someone that is trained in welding, otherwise not so much. Metal coffins offer a sense of permanency as well as a taste of luxury. They are lighter than other materials and thus allow them to be moved more readily. They give you the benefit of both worlds.
Types of metal used
Most caskets offered are made of, in order of cheapest to most expensive options, steel, stainless steel, or precious metals including copper, bronze or gold. Aluminum seems to be a less popular option in the USA, but there are aluminum coffins for export from China you can consider.
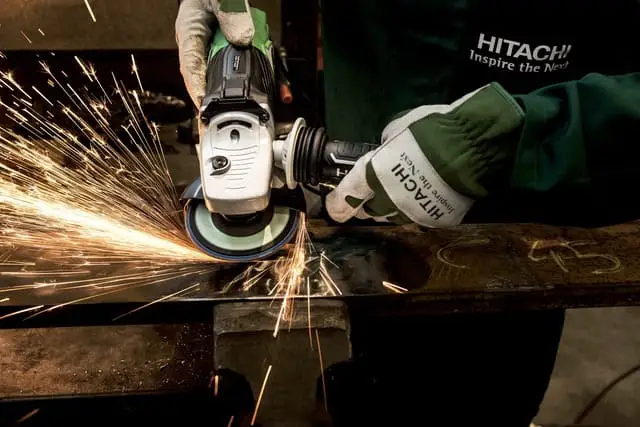
Tools needed
Anyone considering metal as their option will most likely be looking at welding as their main joining method. Although brackets and screws could also be an option. Welding is not something that anyone can just pick up in a weekend by watching a Youtube video or two.
Therefore, if you are really determined to have a metal coffin or casket, then do consider taking a course on the skills you will need or find someone who can do the work for you.
There are quite a few tools, all quite costly, that are needed, and they all come with dangers. For this reason, I won’t go into detail on the tools needed and leave them in the hands of the already capable metalworkers. Just make sure you really research the process and get professional advice before you begin.
Using wood as a building material
Anyone that is seriously considering a DIY coffin will most likely be considering, and wisely so, wood as their material.
Wood offers a traditional look while being environmentally conscience, (depending on some elements). Wood is much lighter than metal, but still offers strength. But wood does lack the perpetuity of metal, although some woods certainly last longer than others.
Of course, once buried this isn’t of great concern, but in terms of storage you want the coffin to last as long as you do!
Coincidentally, the cost of most wood is proportional to its strength, with a few exceptions for rare woods, that are not considered under the umbrella term “lumber”. I will list a few wood choices, that are common, but touching on all wood options is beyond the scope of this article.
Types of wood to consider for coffin/casket construction:
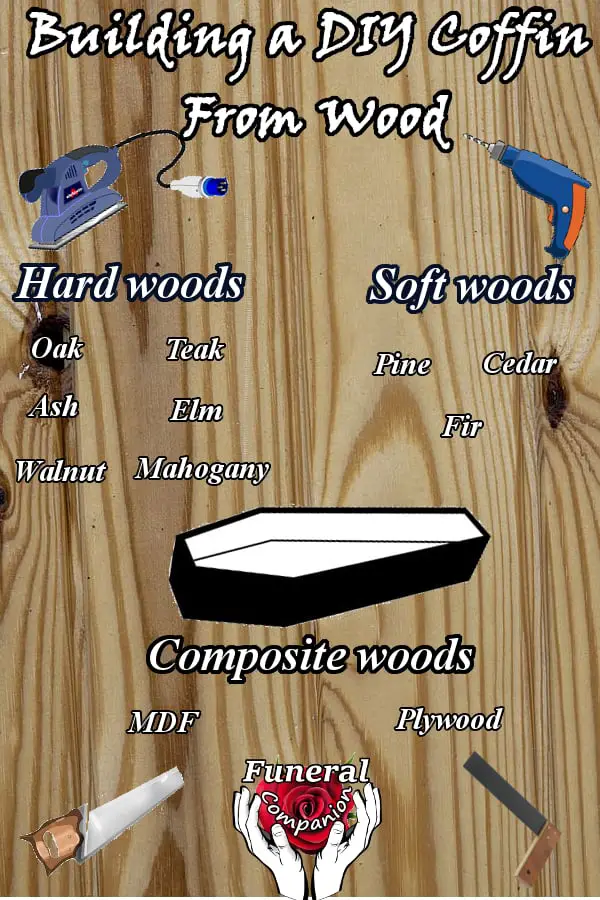
Composite woods
MDF
Cost: Low
Ease of use: Beginner
How green?: Contains resin/ coating
Medium-density fibreboard (MDF) is by far the cheapest option but it might be a stretch to define it as wood. Basically, it is sawdust, or fibers, that have reformed into boards with the use of resin high temperature and pressure.
MDF has some strength, but can also be considered the weakest of the “woods”. Most manufacturers that use MDF, for furniture and other things that need to take a load, coat the product with sealers and strengthening coatings as well as employ engineering that offers added strength.
MDF, however, is easy to work with and can even be cut with a utility knife depending on its thickness. But most people will elect to use normal woodworking tools which will be touched on later.
The Kiwi Coffin Club suggests MDF as an option probably due it it’s cost and ease of use.
Whether MDF is Green or not is a consideration of what resin is used in its production, as well as the coating you choose to apply.
Plywood
Cost: low
Ease of use: beginner
How green?: contains glue
Plywood is a strong board that is made of sheets of thin boards (plies) that are glued together. Their grains are rotated 90 degrees to avoid weak spots. Plywood requires the tools of any of the woods and but is certainly cheaper than solid planks of wood.
Plywood tends to be an eyesore and lack the elegance one might be looking for in their coffin. However, this might not be an issue if they are planning on painting it. Actual wood trim can also be used to hide the layers that are seen on the edges of plywood.
Plywood is certainly a consideration as it will undoubtedly be an upgrade from MDF. Also, the entire coffin does not need to be made of plywood. Perhaps the larger plane could be plywood and thus lower the cost burden of large pieces of wood being purchased.
Plywood’s Green consideration falls under the same scrutiny of MDF. It falls in the glue that was used to adhere the plies.
Using Natural Wood
From this point on I will talk about solid woods. Solid woods are all equally green in that you need only consider your coating and glues used. The following list is by strength (and probably cost) going from the weakest (and probably cheapest) onward to the most durable. After we discuss the woods, we will consider the tools.
Using Softwoods
Pine
Cost: medium
Ease of use: intermediate
How green?: Depends on adhesive/coating used
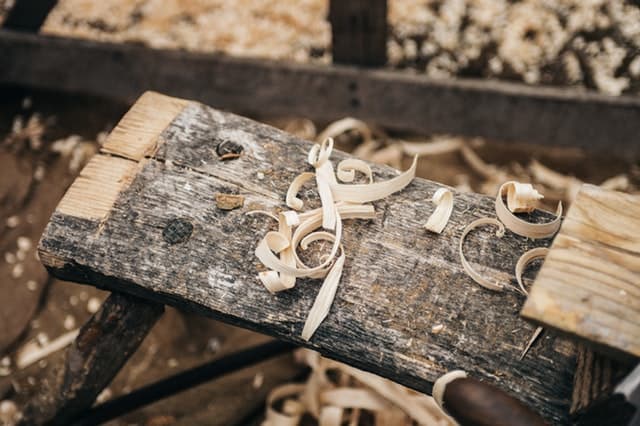
The stereotypical coffin wood is pine and birthed the idiom “the pine box.” Pine is probably the cheapest of “real” woods.
It a fast-growing tree and therefore it is easier to supply. But pine does have its issues. Pine is a softwood that is not particularly easy to work with. Yes, it is easy to cut and fasten, but it warps easily, can be dented with a fingernail, and dries unevenly (your coating and glues). However, pine does take stain very well and thus can easily take on the appearance of other woods.
Cedar
Cost: Medium
Ease of use: intermediate
How green?: Depends on adhesive/coating used
Cedar is most famous for its smell. It is a very fragrant wood, especially when fresh and carpenters enjoy working with it for this reason. It is another softwood, like pine, and is therefore easy to work with. Cedar also has the added benefit of being great outdoors as it holds up well to rot. It will, therefore, add a bit more permanence than that of pine.
Fir
Cost: Medium
Ease of use: intermediate
How green?: Depends on adhesive/coating used
The Douglas fir produces a wood that might be a great choice for a DIY coffin. It has a long pronounced grain, and an excellent strength to cost ratio. That being said, fir is difficult to stain, so you are left with the option of keeping its natural pattern or painting over it which could make it more expensive to use and less environmentally friendly.
Hardwoods
Oak
Cost: medium
Ease of use: intermediate
How green?: Depends on adhesive/coating used
Oak is the stereotypical hardwood. If asked to name a hardwood, I think oak would be the most common answer. I asked a colleague while I was writing this and he said oak. Ask someone near you now if you like and I’ll bet they say oak first.
Oak is hard and durable. The Vikings use oak to make their ships. The English used oak to make their castle gates. Oak is also resistant to rot from fungus and insects because of its high tannin content. Oak also has an attractive aesthetic. Oak is also not a terribly expensive wood. So someone wishing a durable, resistant, and beautiful coffin might turn to oak as a consideration.
Ash
Cost: high
Ease of use: intermediate
How green?: Depends on adhesive/coating used
Ash is the wood of the English longbow because it is hard but very elastic. This elasticity might be a consideration for someone that wants curves in their coffin.
It will certainly hold up abuse. It is said to be easy to work with even though it is hard taking nails and screws easy enough. Musical instruments are also sometimes made of ash. However, most furniture is not. Because of the low demand for the wood, the price of ash can get high. There might be more cost-effective ways to get the durability you desire in your coffin.
Beech
Cost: medium
Ease of use: expert
How green?: Depends on adhesive/coating used
Beech is a wood you would probably be wise to avoid in the building of your DIY coffin. Yes, it is hard, but it has structural weaknesses. The best purpose for beech is firewood because it burns long and hot, but is easy to split with an ax.
Elm
Cost: high
Ease of use: intermediate
How green?: Depends on adhesive/coating used
Elm is the opposite of beech. They are both hardwood but Elm has an interlocking grain that makes it resistant to splitting. Elm was another common wood of bow makers in early England because it, like ash, is elastic. However, Elm is usually about twice as expensive as ash, and therefore ash might be the better choice for your coffin.
Walnut
Cost: high
Ease of use: intermediate
How green?: Depends on adhesive/coating used
Walnut is another hardwood that can last. It has a nice grain and therefore a nice look. But large planks of it are hard to find and therefore a full walnut coffin might not be viable. However, walnut would make an excellent choice for trimming on a plywood build.
Mahogany
Cost: high
Ease of use: intermediate
How green?: Depends on adhesive/coating used
Mahogany is the king of furniture wood. It’s hard and stunningly beautiful with a reddish-brown to deep-red color. If you are looking for a magnificent coffin, mahogany might be your choice. However, be prepared to pay for it because it isn’t grown in sustainable forests and thus it’s supply is limited.
Teak
Cost: high
Ease of use: intermediate
How green?: Depends on adhesive/coating used
Teak is the wonder wood. It is hard and packs a cornucopia of benefits. It is naturally resistant to water and thus is often used as flooring in luxury yachts. The natural oils also offer resistance to termites and other wood-eating pests.
But like mahogany, it is limited and therefore expensive. If you want the best for your coffin you might consider teak. However, it might be a shame to bury such a wonderful wood.
Getting the most out of your material
Having touched on a few types of woods, we can now consider the tools that you will need to complete this DIY coffin project.
First of all, we should, as with any project, begin with plans or blueprints.
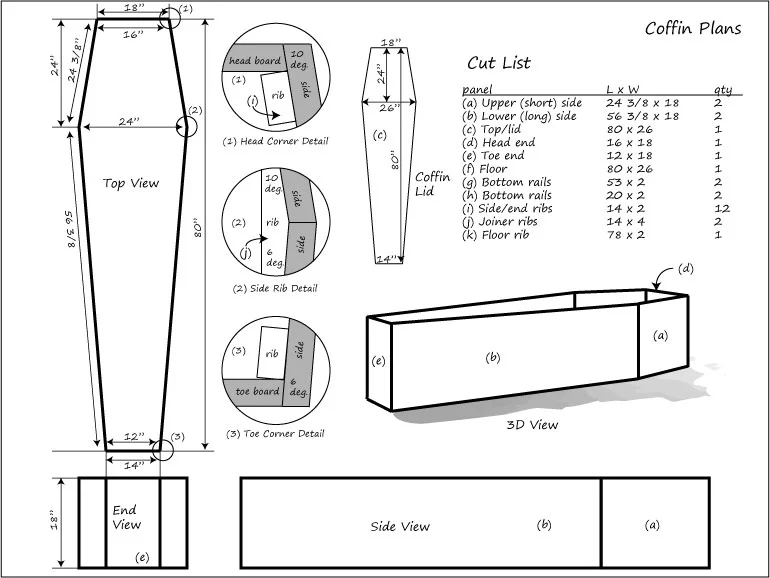
Plans
The Northwoods Casket Company supplies a free plan of a basic coffin found in this image. It’s nothing fancy, but it certainly illustrates that building your own coffin is not a daunting task. Wayne of the Woods also offers a similar level coffin plan here on his site.
For about $10 Rockler sells some plans for casket building here.
For the largest selection of casket plans, turn to casketplans.com
Tools

Recommended tools:
- power tools (for hardwoods in particular)
- a saw
- tape measure
- pencil
- framing square
- hammer or mallet
- (power) drill
- screws or glue
- paint/ vanish
- paintbrush
The type of tools you need might hinge on the wood you have selected. Generally speaking, if you want to use hardwood, it is a good idea to use power tools. However, hardwoods are usually easier to work with green (fresh) and if you can get it so it might be a consideration. If you are looking to do things the traditional way with a little elbow grease, you might be advised to turn to a softwood.
You are going to need to cut the boards. So a saw is a must. You can go with a hand saw, a cross-cut saw, or a miter saw. Depending on what you have or are willing to buy they will all serve the job.
Another essential tool will be a tape measure and a pencil. All the plans require that you cuts the boards to size and the tape measure is going to allow you to do this.
A framing square will help you to keep cuts straight, this is especially useful if you are using a handsaw.
Sometimes you are going to need to knock things around so a hammer will be needed. But perhaps a mallet might also be useful, especially when you are actually hitting the wood pieces. Hammers leave ugly dents in wood.
If you are electing to use screws, as most of the plans call for, you are going to need a screwdriver. A power drill will help a lot with driving in screws to hardwoods.
If you are using a coating like paint, stain, or varnish you are going to need a paintbrush and a rag for cleaning up excess glue. If you are going with a Green coffin, you might be able to avoid these tools by using joints instead of glue and electing to not coat the coffin.
Storage

Once you have made your coffin (or casket) what can you do with it? You will need to find a place to put it.
The people in the Kiwi Coffin Club tend to keep it out in the open like a piece of furniture similar to that of a coffee table or hope chest.
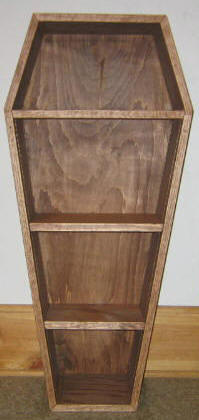
Wayne of the Woods suggests making it into a makeshift bookshelf, like this. I would think if you had gone with a casket design, it might not even be recognizable to someone that didn’t know otherwise.
If you prefer, you could simply store it in the basement, attic, or any other storage option. But if you had gone with one of the more costly wood options, I might be inclined to encourage you to show it off a bit before you buried it forever.
Test it out
Assuming that you have used the correct materials you should be OK here, but just to avoid any unforeseen issue on the day of its use, do test it out. Use weights or even brave a test run by actually getting into your coffin or casket and having friends or relatives bodily lift it.
From a purely health and safety perspective, and also psychological one, it’s better to do this with something of equivalent weight to the ‘body’ than to risk falling through the bottom and onto the floor.
